Are you looking to take your food photography to the next level? If so, continuous lights might be the answer. Continuous lights provide a consistent light source that won't fluctuate with natural light, making it much easier to capture the perfect shot. With continuous lights, you can create stunning images that stand out from the rest. In this article, we'll discuss the benefits of using continuous lights for food photography and how to make the most of them.
How to Choose the Right Lighting Setup for Your Needs
When choosing a lighting setup for food photography, there are several factors to consider.First, you need to determine the size and shape of your space. If you’re shooting in a small studio, you might not have enough room for large lighting equipment. On the other hand, if you’re shooting in a large space, you may have the room for larger lights. The type of light you need also depends on your needs.
If you’re looking for a soft, even light, then fluorescent or LED lighting may be the best option. However, if you’re looking to create more dramatic shadows and highlights, then strobe lighting may be more suitable. Finally, you should consider your budget when choosing a lighting setup. Different types of lights come with different price tags, so make sure that you’re getting the most bang for your buck.
Examples of Food Photos Taken With Continuous Lights
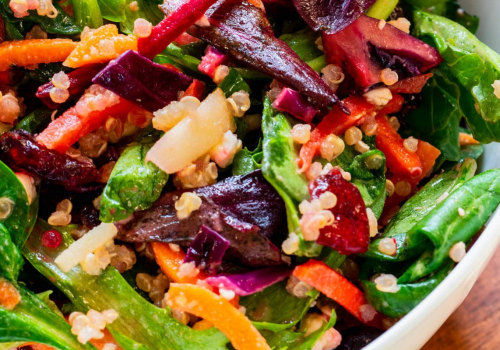
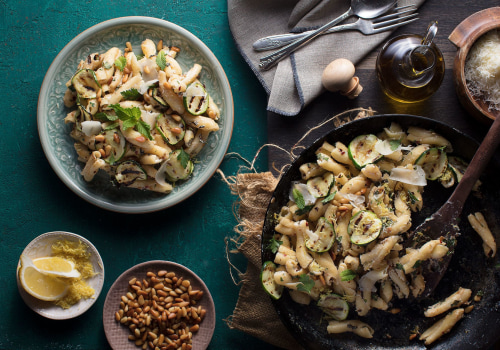
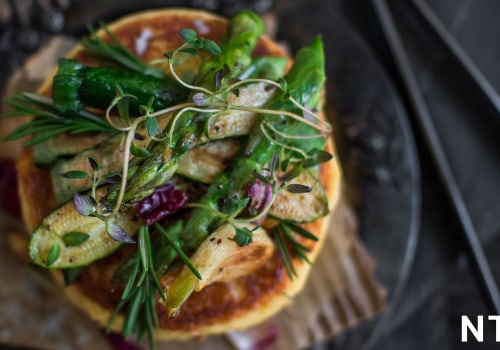
Continuous lights can be used to create stunning food photography images.To demonstrate this, let's take a look at some examples of food photos taken with continuous lights. The first example is a photo of a delicious-looking bowl of noodle soup. The warm tones of the soup contrast beautifully with the cool hues of the white bowl, and the lighting helps to emphasize the steam and texture of the soup. Another example is a close-up shot of a freshly-baked loaf of bread.
The lighting helps to emphasize the golden-brown crust and the intricate detail of the loaf's exterior. Finally, we have a shot of a perfectly-plated steak dinner. The lighting helps to bring out the vibrant colors of the vegetables and the beautiful marbling of the steak. These examples show how continuous lights can be used to create beautiful and dynamic food photography images.
By controlling the color temperature, brightness, and direction of the light, photographers can capture stunning photos with continuous lights.
Types of Continuous Lights
When it comes to food photography lighting, there are a variety of continuous lights available. The most common types are tungsten, LED, and fluorescent. Each has its own unique advantages and disadvantages.Tungsten
is the most common type of continuous light and is used in both commercial and home studios.It has a warm color temperature, is relatively inexpensive, and offers a wide range of brightness levels. However, tungsten lights get very hot and require special handling.
LED
lights are becoming increasingly popular due to their energy efficiency and versatility. LED lights are cooler than tungsten lights and can be adjusted to any color temperature, making them ideal for food photography.They also have a longer lifespan and don’t require special handling. The downside is that they can be more expensive than tungsten lights.
Fluorescent
lights are a popular choice for food photography because they provide a soft and even light source. They’re also energy efficient, require no special handling, and offer a wide range of colors.The downside is that they can be more expensive than other types of continuous lights.
Advantages of Using Continuous Lighting
Continuous lighting is a great option for food photography because it provides consistent color temperature and the ability to simulate sunlight in a studio setting. With continuous lights, you can create a consistent, even light source that won't alter the colors of your food, unlike with flash photography. You can also adjust the intensity of the light and experiment with different lighting setups to get the right look for your food photography.Additionally, you don't have to worry about the need to constantly replace flashbulbs. Another advantage of using continuous lights is that they are usually more affordable than flash units. This makes them a great option for photographers who are just starting out and need a budget-friendly lighting setup. Additionally, continuous lighting is easier to control than flash units, allowing you to create a range of lighting effects with minimal effort. Continuous lights also offer more flexibility when it comes to creating the perfect shot. You can adjust the intensity of the light, move it around easily, and experiment with different lighting setups to get the look you want.
This makes them ideal for food photographers who want to capture that perfect shot.
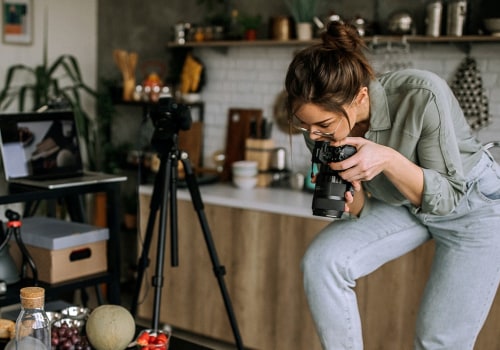
Tips for Setting Up a Continuous Light Rig
When setting up a continuous light rig for food photography, there are several tips to keep in mind. To begin, you should use diffusers and reflectors to spread out the light and reduce harsh shadows. This helps create a softer, more even light that is ideal for food photography. Additionally, you should adjust the power of the lights to make sure they are producing the right amount of light for the shot.Finally, you should balance the ambient and natural light in the space to make sure your food is correctly lit. Using diffusers can be a great way to add softness to your food photography lighting setup. Diffusers work by dispersing the light from your continuous lights, which helps create a more even and soft light. Reflectors are also useful for bouncing light onto your food to add depth and texture.
When setting up your continuous lights, you should adjust the power of the lights to ensure that the correct amount of light is being produced for the shot. When using multiple lights, you can adjust the power of each light to create interesting lighting patterns and shadows that can add depth and interest to your photos. Finally, you should balance the ambient and natural light in your space. This can be done by adjusting the power of your continuous lights and adjusting the shutter speed on your camera.
By balancing the ambient and natural light, you can create a more even light that will make your food look its best. Continuous lights are an ideal choice for food photography, as they provide a consistent color temperature and the ability to simulate natural light. They are also easy to set up and maintain, making them great for studio and location shoots. When choosing a lighting setup, keep in mind the type of light, the size of your space, and the type of food you are photographing. With the right setup, continuous lights can help you create stunning food photography. For further resources on using continuous lights for food photography, check out these helpful guides: What is Continuous Light?, How to Choose the Right Lighting for Food Photography, and How to Choose the Right Light for Food Photography.


Leave a Comment