Are you a budding food photographer looking to take your photos to the next level? Then you should consider using presets for food photography. Presets are a great way to quickly and easily apply editing effects to your photos that give them a professional and polished look. Whether you’re a professional or an amateur, presets can help make your food photography stand out from the crowd and help you create stunning images. In this article, we’ll explore the basics of using presets for food photography and discuss some of the advantages of this post-processing technique. Are you looking for tips and tricks to take your food photography to the next level? Using presets for food photography is a great way to get the most out of your photos.
Presets can help you add interest and texture to your food photos, while also allowing you to make quick adjustments in post-processing. In this article, we'll discuss the basics of using presets for food photography, what they are and how they can help you achieve the results you're looking for. We'll also cover some tips and techniques to help you take advantage of presets in your food photography. Read on to learn more about using presets for food photography!
What are Presets?
Presets are digital tools that allow photographers to quickly apply a specific set of effects to their images.These effects can include color correction, contrast adjustments, sharpening, noise reduction, and various other image-enhancing techniques. By using presets, photographers can save time and effort when editing photos, as they don't have to manually adjust each setting. When it comes to food photography, presets can be a great way to help you create stunning images quickly and easily. There are a variety of presets available, such as light and airy, moody and dark, vibrant colors, or black and white. Each preset has its own look and feel, and can be used to help bring out the best features of your food photography. Presets can also be helpful in creating a consistent look and feel for your food photography.
For example, you can use the same preset for all of your photos to create a cohesive style. This can be especially useful if you are creating a portfolio or website. In addition to the different presets available, there are also a variety of tools that can be used with presets to help you get the most out of your food photography. These tools include cropping tools, retouching tools, and sharpening tools. With these tools, you can further customize your photos to make them look their best. Using presets for food photography can be an invaluable tool for creating stunning images quickly and easily.
With the right presets and tools, you can take your food photography to the next level.
Applying Effects
Effects are a great way to add a unique look to your food photography. From blurring and sharpening, to vignetting and more, there are a variety of effects that can be applied to give your photos a personal touch. Blurring is an effective effect for creating a dreamy, ethereal look in food photography. This effect can be used to create an out-of-focus background or to soften the lines of an object.To blur the background, use a shallow depth of field or a large aperture on your camera. Alternatively, you can use post-processing tools like Photoshop and Lightroom to blur the background after the photo has been taken. Sharpening is another effect commonly used in food photography. It is used to bring out the details in an image and make them stand out more.
It is also effective for creating a crisp, clean look. To sharpen an image, use a small aperture on your camera or adjust the sharpening settings in post-processing software. Vignetting is a popular effect in food photography, as it helps to draw the eye to the center of the image. This effect is created by darkening the edges of the image, resulting in a subtle frame around the subject.
Vignetting can be done in-camera using a vignetting filter or with post-processing software. There are other effects that can be used to enhance food photography, such as color grading and HDR effects. Color grading is used to add a certain look or feel to an image, while HDR effects are used to bring out more details in an image by blending multiple exposures together. These effects can be used individually or in combination with one another to create unique looks in food photography.
Experiment with different effects to find out which ones work best for your images.
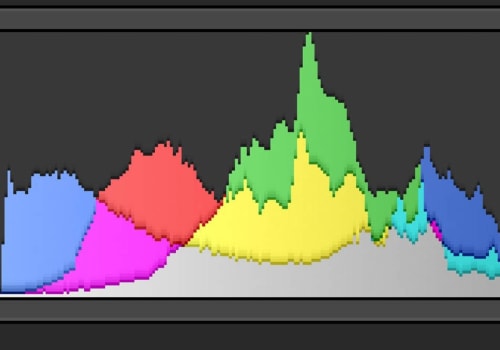
Using Color Correction
Color correction is an important part of food photography, as it can help to make the food look more appealing and can bring out the subtle details of the food. Color correction can be used to enhance the colors of the food, make them more vibrant, or to mute them to create a softer look. It can also be used to adjust the white balance of the photo, which can help to make the colors appear more natural. To use color correction effectively in food photography, it is important to understand the basics of color theory. This includes understanding what each primary and secondary color represents and how they interact with each other.Understanding how different colors affect each other can help you to create balanced and eye-catching images. Additionally, it is important to understand how lighting affects color, as different lighting conditions can cause colors to appear differently. When using color correction in food photography, there are a few different methods that can be used. One method is to adjust the hue and saturation of the image. Hue refers to the overall tone of the image, while saturation refers to the intensity of the color.
Adjusting these settings can help to enhance or mute certain colors in the image. Another method is to adjust the white balance of the image, which can help to make colors appear more natural. Another way to use color correction in food photography is to adjust the levels of contrast in the image. Increasing or decreasing contrast can help to emphasize certain aspects of the food, such as texture or detail. Additionally, adjusting levels can also help to make colors appear brighter or more subdued. Finally, another way to use color correction in food photography is to apply filters.
Filters can be used to add a specific look or feel to an image and are especially helpful in creating moody or dramatic images. Filters can also be used to add a vintage look or to boost the saturation of certain colors. In conclusion, color correction is an important part of food photography and can help to make photos look more appealing and vibrant. By understanding the basics of color theory, adjusting hue and saturation settings, white balance, levels, and applying filters, you can create stunning photos with little effort.
How to Choose the Right Preset
When it comes to creating stunning food photos, it can be difficult to know which preset will be the best for the situation. It's important to take the time to choose the right preset for your photos, as this can make all the difference in creating a beautiful image.There are a few tips that can help you in choosing the right preset for your food photography. First, think about what type of image you want to create. Are you going for a bright and cheerful look, or a more muted and rustic vibe? Different presets will produce different results, so it's important to consider the overall atmosphere you want in your photos. You should also think about what kind of lighting you will be using when taking your photos. Different types of lighting can affect how a preset looks, so it's important to keep this in mind when choosing a preset. For example, if you're using natural light, a warm preset may work better than a cooler one. It's also important to consider the type of food you are photographing.
Different foods require different post-processing techniques, so selecting a preset that is tailored to the food you are photographing is essential. For example, if you are photographing an ice cream sundae, a vivid and vibrant preset may work better than one that is more muted and subtle. Finally, consider how much editing you want to do after taking the photo. Different presets offer varying levels of control over how much editing can be done afterwards. If you want to be able to make adjustments after taking the photo, look for a preset that offers more control over the editing process. By taking the time to choose the right preset for your food photography, you can ensure that your photos look their best.
There are many different types of presets available, so it's important to consider your lighting, food type and editing preferences before selecting one. Presets can be a useful tool for creating stunning food photos with minimal effort. Whether you're a beginner or a professional photographer, they can help you take your food photography to the next level. By understanding how to choose the right preset, apply color correction, and apply effects, you'll be able to create beautiful food photos with ease. For the best results, it's important to experiment with different presets and find the one that best suits your style. Additionally, it's important to understand how to use color correction and effects to further customize your photos and make them truly unique.
With the right combination of presets, color correction, and effects, you can create stunning photos that will impress everyone.


Leave a Comment