Creating texture and depth in photos can be a daunting task for amateur photographers. The challenge of creating an image that is both visually interesting and has a certain degree of complexity can be difficult to achieve. Fortunately, there are a few simple tips and tricks that can help you create stunning photos with texture and depth. Whether you're shooting landscapes, still lifes, or portrait shots, understanding how to use the right lighting and angles to create texture and depth can make all the difference in your photography. By mastering the basics of how light interacts with objects in your frame, you can create amazing photos that draw the viewer in and tell a story.
In this article, we'll look at some of the most effective techniques for creating texture and depth in your photos.
Setting Up the Environment
When it comes to creating texture and depth in photos, setting up the environment is key. The right background elements, angles, and perspectives can make all the difference in a food styling photo. Choosing the right background elements can be tricky, so it's important to consider the overall theme of the photo and how it will look when the photo is taken. It's also important to consider the lighting and shadows that will be created in the photo. For food styling photography, a neutral background like a white wall or white paper works best.This helps to minimize distractions and allows the food to be the focus. Darker backgrounds can work well too, but they should be balanced with lighter elements to prevent the food from being lost in the shadows. When using darker backgrounds, experiment with different lighting techniques to create interesting shadows and highlights. Different angles and perspectives can also add depth to food styling photos. For example, shooting from a lower angle can make food look larger than life, while shooting from above can create a more intimate feel.
Experimenting with different angles and perspectives can lead to creative and unique photos. Creating texture and depth in photos for food styling photography requires careful consideration of the environment and equipment. Taking time to choose the right background elements, angles, and perspectives can make all the difference in creating beautiful food styling photos.
Using Props to Create Texture and Depth
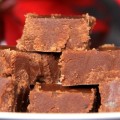
Creating texture and depth in food styling photography can be done in several ways, one of which is using props. Props such as fabrics, dishes, and utensils are ideal for creating texture and depth. By using different props, you can create a variety of textures and depths that will add character to your photos.When choosing props for food styling photography, it's important to consider the type of texture you want to create. Different fabrics, dishes, and utensils will provide different types of textures. For example, a fabric with a rough texture will create a more dynamic image than a fabric with a smooth texture. Likewise, a dish with a deep rim will create a more interesting depth than a shallow dish.
When setting up the environment, the props should be placed strategically so that they contribute to the overall composition. For instance, if you are trying to achieve a certain depth or texture, consider how the prop will blend into the background or foreground. Also, consider how different props will interact with each other and how they will affect the light in the scene. Finally, when adding finishing touches to your photos, props can be used to add extra texture and depth.
Props such as fabrics and utensils can be used to enhance the lighting in the scene or to add visual interest. Additionally, props such as dishes and utensils can be used to create reflections or other effects that can make your photos stand out. By using props to create texture and depth in photos for food styling photography, you can make your photos stand out. Consider the type of texture and depth you want to create, strategically place the props in the environment, and use props for added finishing touches to make your photos look professional.
Creating Texture and Depth with Lighting
Creating texture and depth in photos can be done with the help of lighting, such as using highlights and shadows, backlighting, or natural light. Highlights and shadows can give images a greater level of dimension, while backlighting can create a strong contrast that emphasizes texture. Natural light can create a soft, dreamy effect. All of these techniques can be used to enhance the photo in different ways. Highlights and shadows can be used to create depth and texture by adding contrast between light and dark areas.This adds dimension to the image and can also be used to emphasize certain elements of the composition. When using highlights and shadows, it's important to pay attention to the direction of the light and the intensity of the shadows. For example, if you want to emphasize texture, use directional light with strong shadows. Backlighting is a great way to create texture and depth in photos. It produces a strong contrast between light and dark areas, which emphasizes texture and creates an interesting visual effect.
By positioning the light behind your subject, you can create a dramatic look that highlights the texture of the object. However, it's important to keep the light from spilling onto other parts of the image or it will wash out the details. Natural light is another great way to create texture and depth in photos. It's softer than artificial light, which can be used to create a dreamy effect. When shooting with natural light, it's important to pay attention to the direction of the light as this will affect the way your subject looks.
You can also use reflectors or diffusers to soften the light and create a more even look. Creating texture and depth in photos is an important part of food styling photography. By using lighting, shadow, and other effects, you can make your photos stand out. With the right equipment and setting up the environment properly, you can create stunning images that capture the beauty of your subject.
Choosing the Right Equipment
Creating texture and depth in food styling photography is often dependent on the equipment you use. The right combination of camera, lens, and lighting equipment can make all the difference in a finished photo.Cameras: When it comes to food styling photography, it's important to choose a camera that can capture sharp images with vibrant colors and great detail. Digital SLR cameras are best for this type of photography as they provide more control over settings and offer better quality images than other types of cameras. Additionally, look for a camera with a high megapixel count, so you can capture more details in your photos.
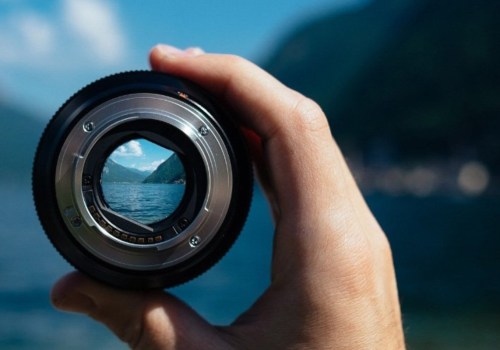
Lenses:
The lens you choose is also important when it comes to food styling photography.Prime lenses are ideal as they are sharper and provide better image quality than zoom lenses. Additionally, look for lenses with wide apertures, so you can create soft backgrounds and blur out distractions.
Lighting:
Lighting is also essential when it comes to food styling photography. Natural light is best as it will give your photos a softer, more natural look.However, if you need more control over the lighting, you can use studio lights or off-camera flashes. These will allow you to adjust the brightness and direction of the light for more dynamic photos.
Tips for Choosing the Right Equipment:
When it comes to choosing the right equipment for food styling photography, there are a few things to keep in mind. First, consider your budget and choose equipment that fits within it. Second, do your research and read reviews on different cameras, lenses, and lighting equipment before making a purchase.Finally, invest in quality equipment that will last for years and make sure to practice with it before shooting. Creating texture and depth in photos is an important part of food styling photography. By using lighting, props, the right equipment, and setting up the right environment, you can make your photos stand out. When adding finishing touches, consider background elements, colors, and textures that can help bring out the texture and depth of the food. With these tips, you can create stunning photos that will draw the eye of your viewers.


Leave a Comment