Are you looking for tips and tutorials on how to take stunning flash photography for food? If so, you’ve come to the right place! Flash photography is a great way to make your food photography look more professional and add a creative flair to your images. In this article, we’ll provide you with tips and tutorials on how to use flash photography for food and the different lighting techniques you can use to bring out the best in your photographs. Read on to learn more and get inspired!
Lighting Techniques for Flash Photography
Lighting Techniques for Flash PhotographyWhen taking food photos with flash, it's important to understand the different types of lighting techniques available. From bounce flash to ring flashes and off-camera flashes, each type of lighting setup offers a unique look.Bounce flash is a popular technique for food photography. It involves bouncing the light off a wall or ceiling, which softens the light and creates a more natural-looking effect. This is ideal for close-up shots of dishes with intricate details. Ring flashes are often used for food photography because they provide an even, uniform light that highlights the texture and shape of the dish.
They also create an attractive glow around the subject. Off-camera flashes are great for creating dramatic lighting effects. By positioning the flash away from the camera, you can create more depth and contrast in your photos. No matter which type of lighting technique you choose, it's important to experiment and find the one that works best for you and your food photography style.
Post-Processing Tips
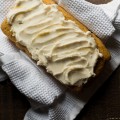
Post-processing is the final step in creating stunning food photos. With the right tools and techniques, you can enhance your photos and make them look their best. First, you'll want to adjust the white balance to make sure colors are accurate. This can be done in your photo editor or in post-processing software such as Adobe Lightroom or Photoshop.You'll also want to adjust the exposure, contrast, and brightness. This will help bring out details and texture in your photos. Finally, you can add some extra details with filters or effects. For example, you can use a Vignette filter to draw attention to the subject or use a blur effect to give a dreamy look to your photos.
Post-processing tools are essential for creating beautiful food photos. Experiment with different tools and techniques to find the best look for your photos.
Using Natural Light in Combination With Flash
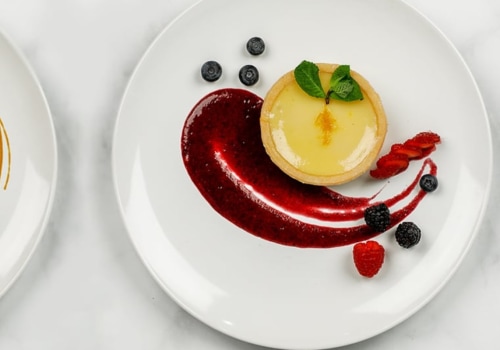
Flash photography for food can be challenging, but the reward of stunning and vibrant photos is worth the effort. One effective way to achieve the desired effect is to use natural light in combination with flash. By positioning your lights and adjusting your settings, you can create dramatic results that add an extra layer of interest to your food photos. When using natural light in combination with flash, it's important to consider the direction of the light source.Positioning the flash directly behind the subject will help to create a well-lit photo with minimal shadows. When using both natural and artificial light, you may also want to experiment with different angles in order to produce the best effect. To reduce the harshness of the flash, diffuse it by using a softbox or bounce it off a wall. Another way to create dramatic food photos is to combine natural light with side lighting. This technique will add shadows and definition to the photo, resulting in an image that looks more dynamic.
Again, try experimenting with different angles and distances to find the best solution for your shot. Using natural light in combination with flash can be a great way to take your food photography to the next level. With some practice and experimentation, you'll soon be able to capture stunning images that will make your dishes look their best.
Choosing Equipment for Flash Photography
When it comes to flash photography for food, the right equipment is essential. The most important pieces of equipment are a camera, flash unit, and light stand. Depending on your budget, portability needs, and type of photography, you'll need to select the equipment that best suits your needs. When it comes to cameras, DSLRs are the best choice for flash photography for food.They offer manual control over settings, allowing you to adjust the shutter speed, aperture, and ISO to get the perfect shot. A good camera body should also have a hot shoe mount for attaching a flash unit. The flash unit is the most important piece of equipment for flash photography for food. It provides the light needed to properly illuminate the dish or scene. Look for one that is adjustable and has multiple power settings so you can dial in the perfect amount of light.
You'll also want one with a tilt head so you can angle the light as needed. Finally, you'll need a light stand to attach the flash unit. Look for one with an adjustable height and tilt head so you can easily move it around. The type of stand you choose will depend on your budget and portability needs. When choosing equipment for flash photography for food, it's important to consider your budget and portability needs. You'll also want to select the right camera, flash unit, and light stand to suit your specific needs.
Tips and Tricks
When taking food photos with flash, it’s important to understand how the light will interact with the dish.To get the best results, you should choose the right equipment and set up the perfect lighting. Here are some tips and tricks to help you achieve stunning food photos with flash:Choose the Right Equipment: The type of flash you choose will depend on the size and shape of the food you’re photographing. For example, if you’re shooting a large plate of food, you may want to opt for a large flash unit. On the other hand, if you’re shooting a small dish, a smaller flash unit will do the job.
Set Up the Perfect Lighting: When setting up the lighting for your food photos, it’s important to avoid harsh shadows and overexposure. You can adjust the angle of the flash and distance from the food to find the perfect lighting for your dish. Experiment with different angles and distances until you’ve achieved the desired effect.
Troubleshoot Common Problems:
When using flash photography for food, you may encounter common problems such as overexposure or red-eye. To troubleshoot these problems, try adjusting the angle and distance of the flash from your subject.If these adjustments don’t work, try using a diffuser to soften the light or use a lower ISO setting.
Setting Up Your Equipment
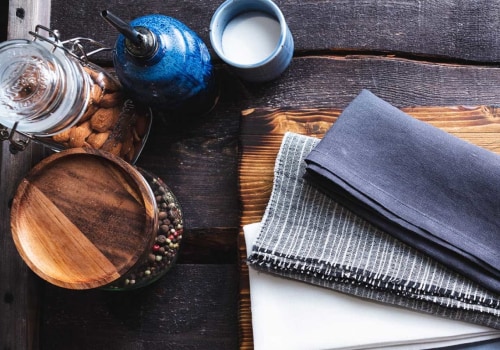
Equipment: When setting up for flash photography for food, it's important to have the right equipment. Start with a camera that can support a flash unit, like an SLR or mirrorless camera. You'll also need an off-camera flash unit, which can be powered by battery or mains power. You'll also need a light stand, umbrella or softbox, and a few accessories such as a flash trigger and reflector.Camera Settings: Once you have the right equipment, it's time to set up your camera for the best results. Start by setting the ISO between 100-200 for optimal image quality. Next, set the white balance to match the light source you are using – for example, if you are using daylight bulbs, set the white balance to 'daylight'. Finally, set the shutter speed to 1/125s or faster to ensure the flash is captured correctly.
Lighting Setup: Once you have your equipment and settings in place, you can start setting up the lighting. If you are using an umbrella or softbox, position it so that it is around 45 degrees from the food. This will create a nice, even light that is perfect for food photography. If you are using a light stand, make sure it is positioned close enough to the food so that the light is still even and not too harsh.
Flash Settings: To get the best results with your flash, start by setting the power level to 1/4 or lower. This will create a softer light that won't overpower the food. You can also adjust the zoom settings on your flash to control how wide or narrow the beam of light is.
Final Touches:
Once you have your equipment and settings in place, it's time to add the finishing touches.If you are using a reflector, position it opposite of your light source to fill in any shadows and add more dimension to your photo. You can also use gels to add color to your photos or use a snoot to create interesting lighting effects. In this guide, we've explored the basics of flash photography for food and provided tips and tricks to help you capture beautiful images. We discussed the importance of choosing the right equipment, understanding the different lighting techniques, setting up your equipment, and combining natural light with flash. We also shared some helpful post-processing tips to give your images a professional look.
With practice and experimentation, you can develop a style that captures the beauty of your dishes. For more information, check out our resources below.


Leave a Comment